
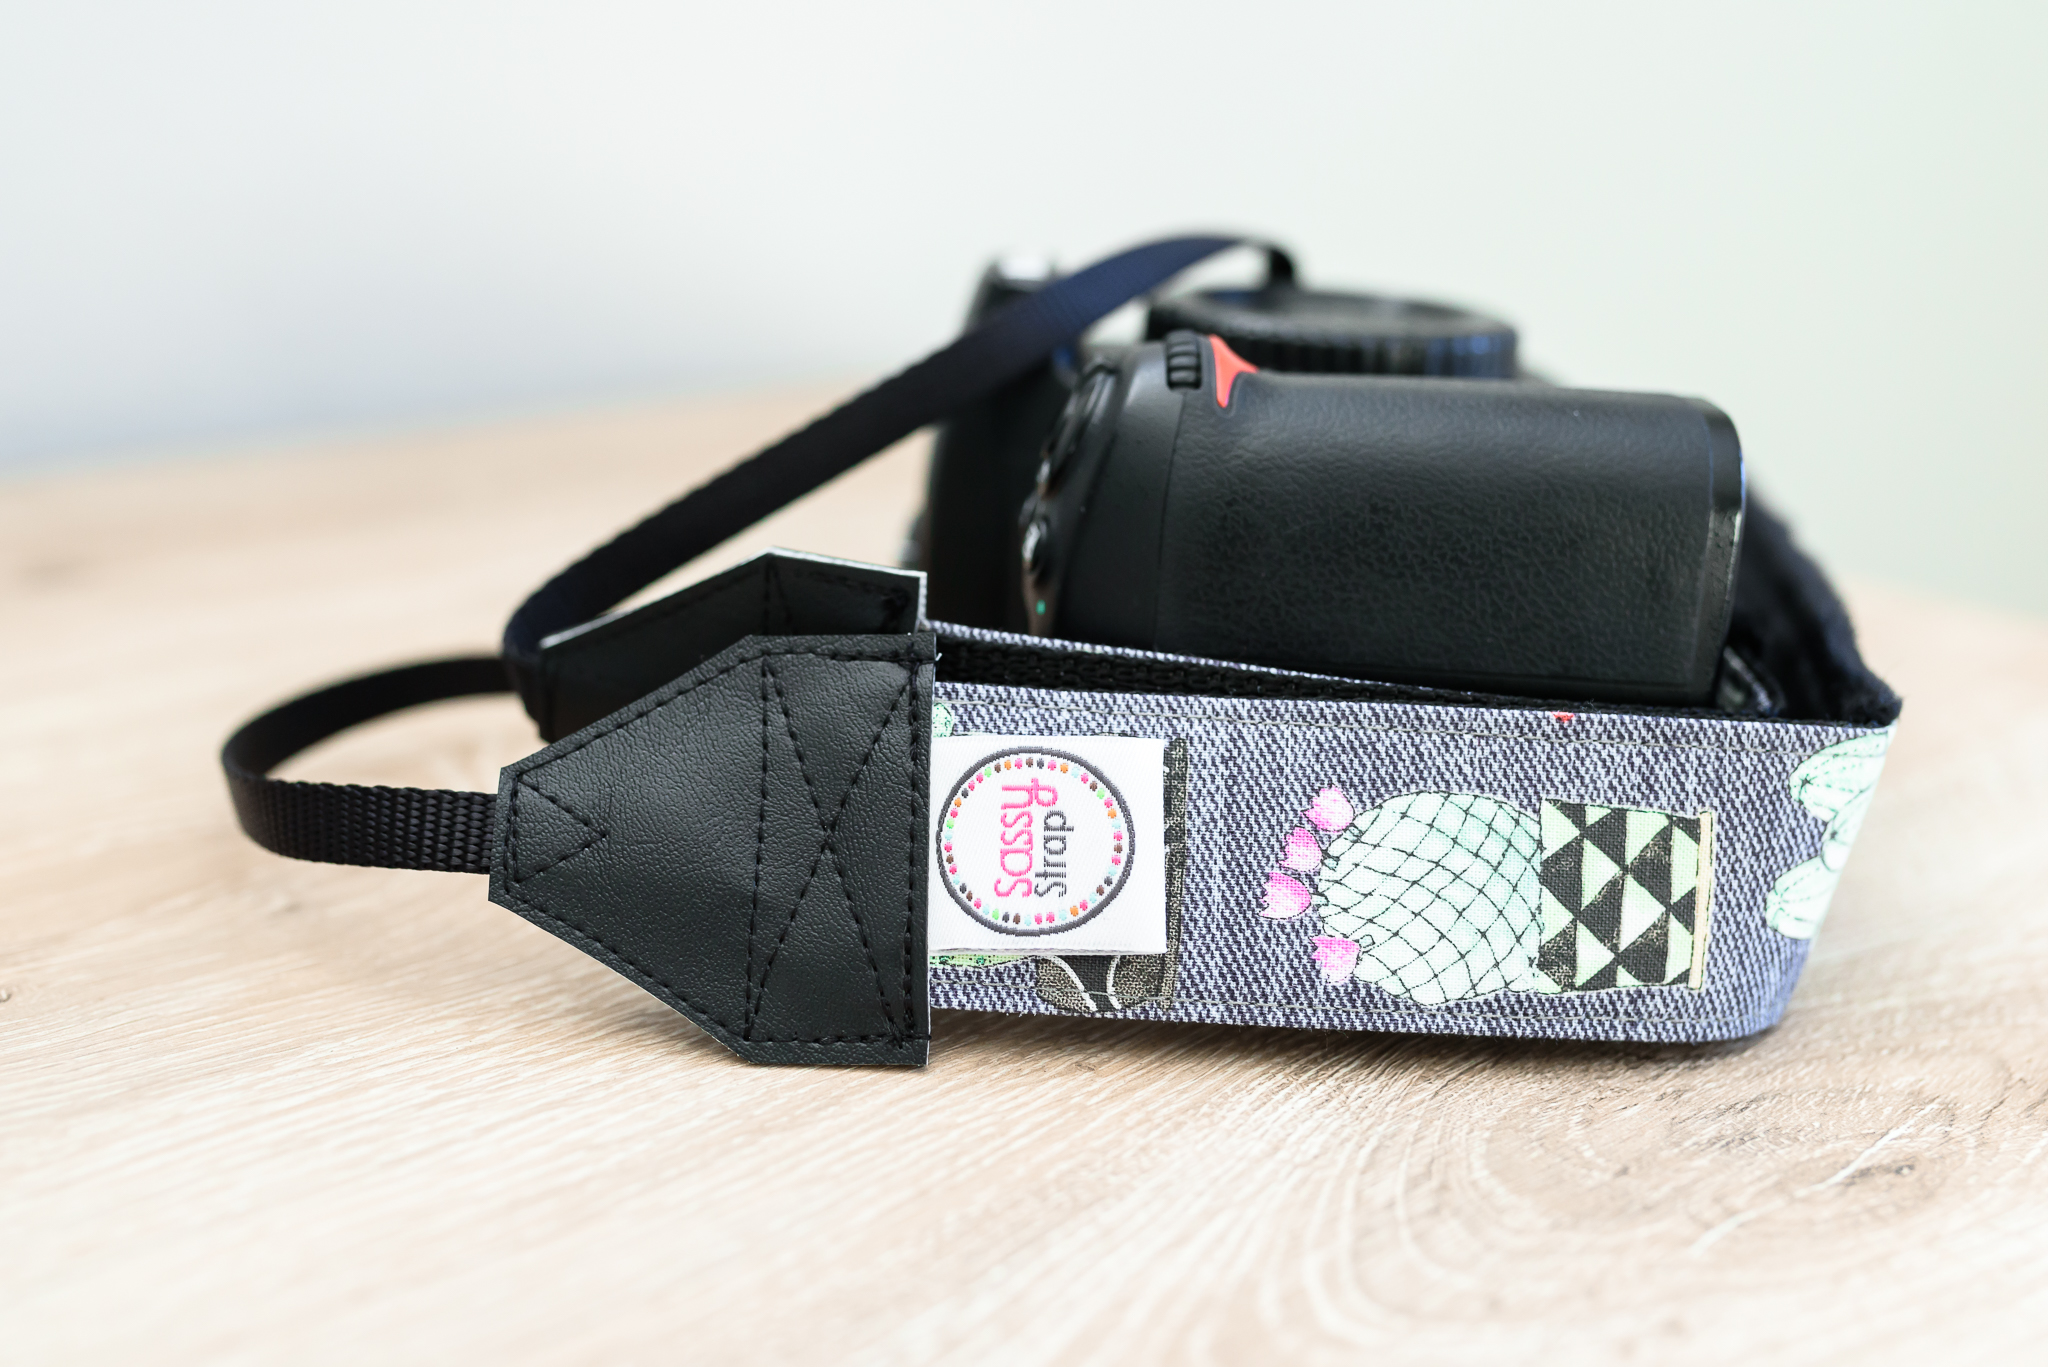
So you’ve invested in professional photos and you’ve made it as far as downloading and backing up all of your images. Great! Now for the really fun part: showing off all those pretty photos on social media. You might be wondering if you can upload photos from your phone, or just screenshot a photo off of your gallery and upload that. My short answer is NO! It maybe tempting to screenshot photos rather than saving them and re-uploading, but I promise you there will be a major, MAJOR difference in quality. Even if you don’t see the differences from a mobile device, the nearly 50% of people viewing your gorgeous images from a desktop will see every compressed, pixelated artifact in that photo. There are truthfully many right ways to upload your images, but that is objectively a wrong way to do it if quality matters to you at all (and it should if you’ve invested in a professional).
Now that we have the short answer out of the way, let’s just dive right into the long one. Step by step, so you can follow along and refer back to this again if you need. If you’re a client trying to upload professional images from a photographer, read this first process! If you’re a photographer looking for advice on exporting images from your editing software, skip to the bottom!
How to Save and Share your Photos from your Photographer
Step 1. Saving Images
The first step is to properly save the professional images from your photographer with their specific instructions. If you’re a client of mine that means you were given a link to a gallery hosted by Pixieset.com, and download instructions with a PIN number are attached. You will need to access a desktop computer to properly download all of your images at the same time, but you also have the option of downloading images one by one from your mobile device. However you download your images, make sure you move them from your download folder to a safe cloud storage AND physical hard drive. I don’t keep my galleries on Pixieset forever!
Step 2. Facebook Sharing
After you have downloaded, saved, and stored your full professional or high resolution images and backed them up in at least two ways, the fun begins. Facebook has recently (as of December 2017) updated their photo compression settings on your uploaded images. You used to have to compress it yourself or facebook would churn out a mangled version of your photo for you. However, facebook is currently friendly with full resolution images, and you can honestly upload those directly for high quality viewing. If you’re uploading a new profile picture, please do so on a desktop so you can “skip” the cropping option and upload the entire photo as your profile picture. You can of course crop the thumbnail to your desire, but by skipping the first cropping step people can still see your full professional image when they click to view. This is very important for both quality and courtesy to your photographer, who took a lot of effort to create the composition of your image. It is recommended that you always upload from a desktop rather than your phone if you have the option. Again, NEVER SHARE A SCREENSHOTTED IMAGE. DON’T DO IT. 🙂
Step 3. Instagram Sharing
To share your pretty photos to instagram, you may have to do a little extra work. One way to get high quality images to your phone for sharing on instagram is to use facebook messenger and send the original image to yourself. From your phone, open the message to yourself and save that by pressing the image until a save or download option comes up. Once you click save, you can upload that image to instagram in high resolution. That’s really all it takes! If you want another way to upload images, try using a third party app or extension to resize for instagram. There are apps that create white frames or borders so you don’t have to crop your photo, and they are easy to find and use. You can also download an extension for chrome called “Chrome UA Spoofer”, which will allow you to operate on google chrome from your desktop as if you were on a mobile phone. This is a total game changer, because you can simply upload images directly to instagram.com. Try it! (If you do use this technique you should compress your image first with a free software like Canva; I recommend maintaining your photos dimension but using 2048 pixels on the long edge.)
Another method is to upload your photos to flickr.com in full resolution, and download from there directly by choosing the image size you desire. Again, I recommend 2048 pixels on the long edge. I love using this method because it doubles as a way to store your photos for an added backup platform.
(Photographers) How to Export your Images
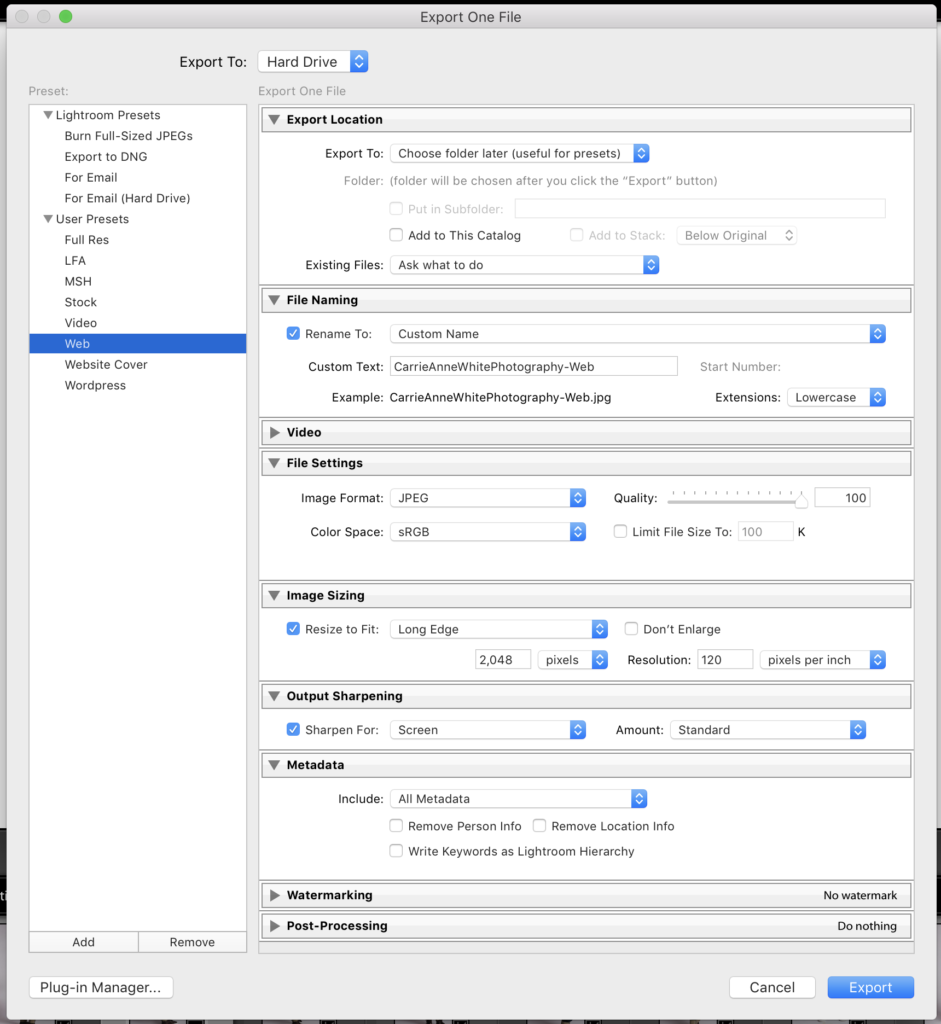
Web optimized images
It’s useful to export for web specifically so that your photos are ready for ANY social media platform, armed with the proper compression straight from your editing software. For social media, it’s a good idea to use these export settings to preserve the quality of your image. I’ll show you my export preset settings below from lightroom because that’s what I use to export my images. If you exclusively export from photoshop, you can still use these export setting but they will look a little different. A key difference with photoshop is the image quality slider, which goes up to level 12, so go ahead and MAX out your quality by selecting 12.
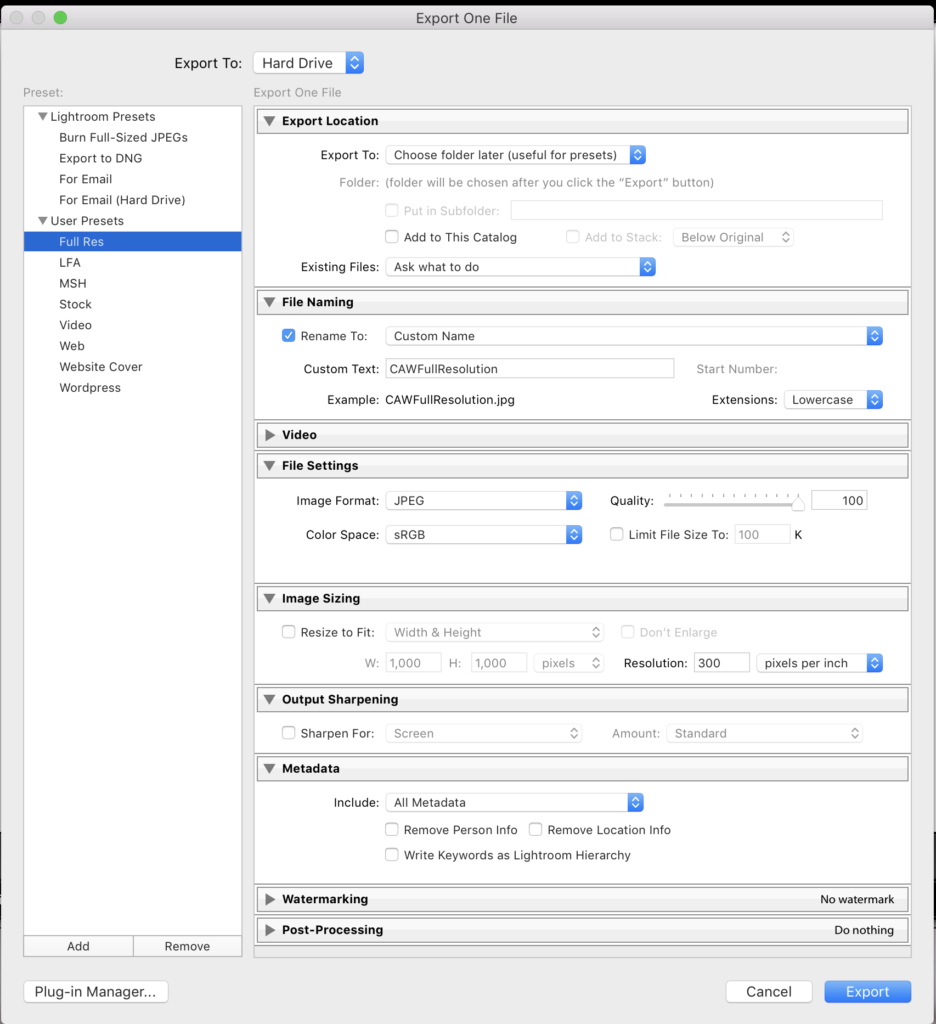
Full Resolution (Give these to your clients)
The settings below are for final image delivery to your client, and they allow for high quality prints at any size (assuming they are printed through a professional lab that handles sRGB color coding). You may want to deliver both web optimized AND full sized images to your client (I do!), but be sure you AT LEAST give them full resolution, print-ready photos if you plan to give them a personal print release with their digital images.
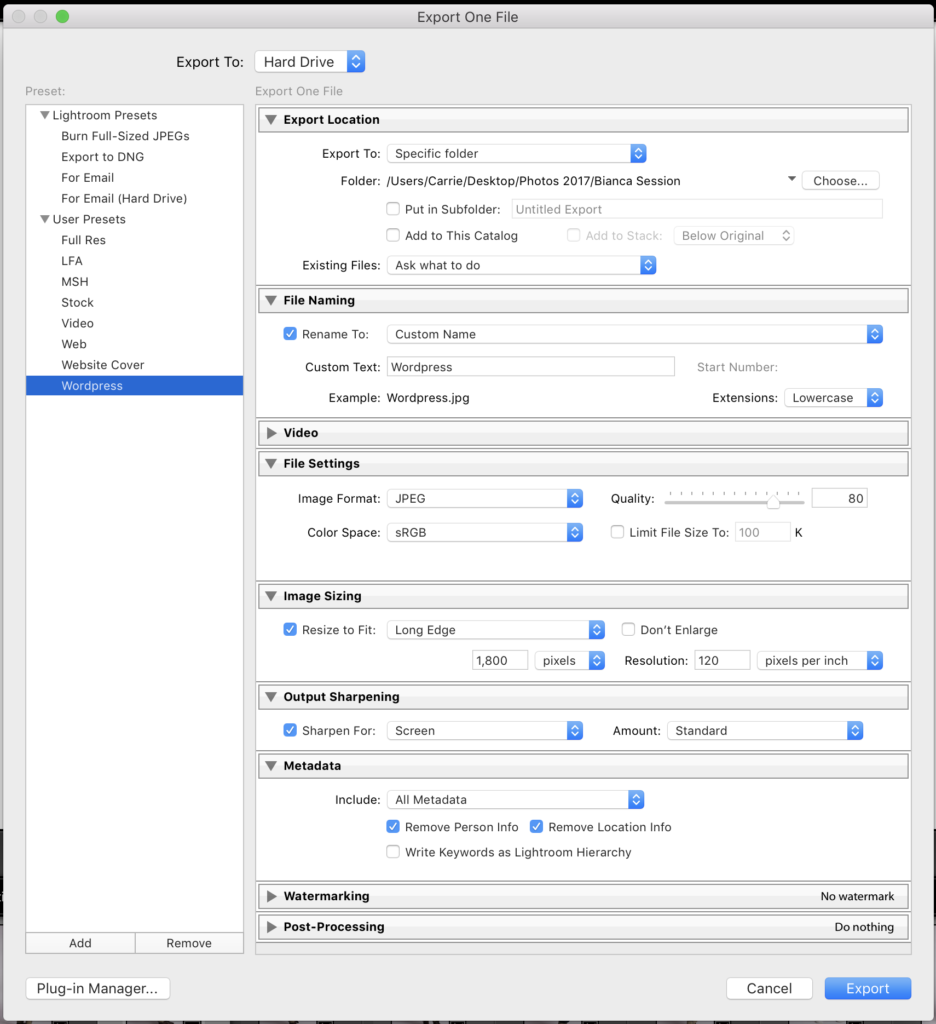
Exporting for Your Website
Website settings are a little different from other platforms because the size of your images has a tremendous impact on loading time (unfortunately). The typical export settings don’t cut it for website domains like a self-hosted wordpress, so it’s important to size your image just enough that you strike a balance between fast loading times and a high quality viewing experience. I’ve tested a lot off different recommend settings for this, but here is what I’ve found to work the best for me:
If you want to see how these setting look on social media, check out my photos on my instagram or on facebook. I’d love for you to follow my accounts if you stop by! Drop me a comment below on how YOU export or upload your images. Let me know if you learned anything from this post as well! If you’re looking to book a session for headshots or branding images, fill out the contact form as the first step! I’ll be in touch soon!
COMMENTS