

Time Management Strategies for Photo Editing
Editing is a source of pride for many photographers, including me! I get it–you want your photos to wow your clients, and you want to be able to proudly display them on your websites and social media. But there is a fine line between taking control of your work and allowing your work to take control over your life. And let’s be honest, photography workflow is a balancing act that every small business owner/photographer knows all too well. So let’s get down to business the smart way, so you can rekindle a love for what you do, and NOT burn out in the process.
1. Manage Client Expectations
My first time management tip is to say no to impossible or tedious editing tasks at the time of the shoot. Be sure to coach your clients on what they can expect for their edited images, right down to the details. Instead of saying “Don’t worry, I’ll fix that later,” make sure you’re clear about what you can and cannot feasibly “fix” in post. Your client may hear “I’ll make you slimmer, brighten your eyes, fix your roots and uneven hair extensions, and remove your braces in all 45 images” when really, you just meant you’d be able to clone out a spot on her dress in a few images. This is probably the most important time management strategy, so I can’t stress this enough: manage the client’s expectations, and say no when they’re asking for something that can’t be done at their price point. Be clear at the session, and stress less in post.
2. Set Business Hours
Photographers work all the time. Clients message or email us at all hours of the day, and some of us are constantly checking our phones or working at our computers. But we have to at least TRY to set a rigid schedule and only edit during those hours. Make rules for yourself, and respect your time or it will be taken from you. As a bonus, the more you’re aware of your business hours, the more you’ll push to get things done before the work day is over. That way you can enjoy the things that make you happy at the end of the day.
3. Set Priorities
Don’t edit that session you did last night when you have a wedding due the next day. Edit sessions in the order that they’re due, and keep a running list of sessions by your computer to stay organized. The only exception to this rule is when a client opts to pay a higher rate for expedited delivery. My expedite rate is $200, but I recommend setting your own based on your business and pricing model.
4. Cull Smarter
I used to cull in the import dialogue in Lightroom by previewing each image and DESELECTING the “bad” images. If you’re doing this, I beg you to stop and try a better photography workflow. What I NOW do is I open the import window and deselect all the images to start anew. Then I PICK the images that represent the session well. That way I don’t have to get too involved with comparing images in the super slow import process, and I can save the meticulous choices for later. Import all the ones that you think would be acceptable to deliver. Once you’ve imported all the “okay” images, go to the new folder in your library and enter the survey mode (you can just press “n” on your keyboard). Select all the images of the same pose, and pick only ONE from each pose to keep. Flag that as a “pick” by pressing “p” on your keyboard. Do this for every pose! Then just view the flagged images and work from there. You can always narrow it down more as you start the editing process, but at this point you probably have a much more compact gallery to work with.
5. Set Exposure and White Balance
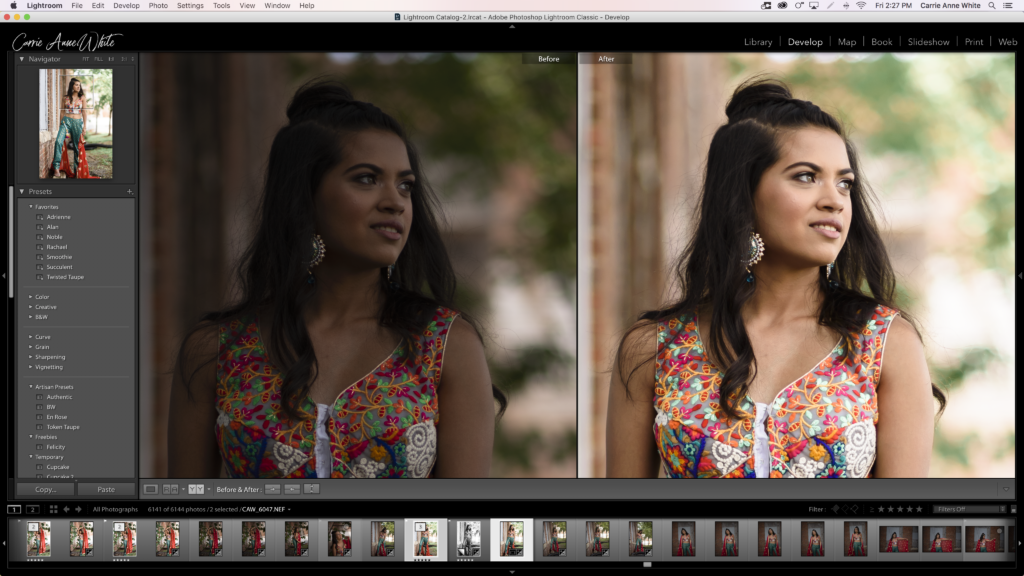
The first thing I do after culling is even the exposures and adjust the white balances–EVEN before applying a preset or touching the sliders. Editing white balance and exposure is easy peasy when you shoot in kelvin and manual settings, because adjacent photos will have the same adjustments. So you can grab two, three, or sometimes ten images at a time to adjust them this way. In any case, I find it crucial to open up the reference view and select one photo as a reference while I go through the rest of the gallery. Otherwise you’ll more than likely see a shift in exposure or white balance from the beginning to the end of your gallery. Stay consistent, my friends.
6. Apply your Presets!
After your images are prepped with proper exposure and white balance, select them all and pop on your go-to preset. My go-to for studio work is Authentic, and my go-to for outdoor portraits is Rachael. Sometimes I’ll use several different presets throughout the same session if the environments are different enough. This is the really fun part of photography workflow, in my opinion, so take your time here and choose the look that compliments the photos the best.
7. Hand Adjustments
Manually go over each and every photo with the reference tool again, comparing your favorite image with each of the other images. Adjust as needed to get a cohesive look. You might need to defying some, or add stylistic brushes to accentuate lighting and colors. You’re the artist!
8. Take it into PS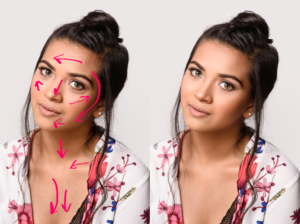
This really is only necessary if you need to fix something with a photoshop-specific tool. Most of my clients are headshot clients, so for EVERY headshot, I pull those into PS for retouching. In PS, I quickly clone or spot heal out of place hairs, visible veins or blemishes, etc. Then I use a shortcut key for my Frequency Separation Action, and crush away uneven skin tones. If the photo needs it, I’ll even do some dodging and burning to make it pop. Then I flatten the image and tap ctrl/command-s to bring it back to LR. I unflag the previous version to avoid duplicates.
9. Export and Upload
You’re done! Export and upload your files with these optimizing tips, then schedule them with a tool like Planoly to post to instagram later on.
Bonus Tip:
Sometimes, a great photography workflow isn’t enough! If you are in over your head with editing, consider outsourcing to either a private editor or a large retouching company. Use a private editor (like me!) If you are a higher end, boutique photographer with wiggle room to consistently pay for the editing help. The advantage to using a private retoucher is that once they learn your style, you don’t have to go through a tedious revision process. I become an extension of my clients, editing with their unique style in mind.
[twenty20 img1=”3350″ img2=”3332″ offset=”0.2″ before=”Before” after=”After” hover=”true”]
So, did you learn anything?! Let me know in the comments below, and don’t forget to share!
Do you have any questions about photography workflow? Head over to the contact page to get in touch or schedule a session online!
COMMENTS